
Website — SPayLater Widget Installation
This guide walks you through adding the SPayLater Promotional Widget to your website — both desktop (PC) and mobile web. Installation is a one-time copy-and-paste of a few HTML snippets. No framework or build tool is required.
What this does
The SPayLater Widget is a lightweight (~12 KB) JavaScript snippet that renders "Buy Now, Pay Later with SPayLater" messaging on your product pages. It runs inside a Shadow DOM container, which means it will never interfere with your existing CSS or JavaScript. The widget self-hides if it cannot load pricing data, so your page layout is never broken by an empty widget container.
Before you start
- Access Key — your unique SPayLater plugin key. Get it from your ShopeePay account manager if you don't have one yet.
- Store ID — the unique ID for your store in the ShopeePay system. Same source.
- Someone who can edit your website's HTML — the steps below are written for a web developer (or any team member comfortable editing HTML templates). No backend changes are needed.
- Content Security Policy (CSP) awareness — if your site uses a CSP header, you will need to add ShopeePay's domains to the allowlist. See the Developer note in the Installation steps for the exact rules.
Merchant tip: Send your web developer this page along with your Access Key and Store ID. That is everything they need to complete the installation.
Installation steps
Step 1 — Load the SPayLater Widget script
Copy and paste one of the following script tags into the <head> (or just before </body>) of every page where you want to show SPayLater messaging.
For testing (non-production):
<script src="https://deo.shopeemobile.com/shopee/test/shopee-shopeepayfe-test-global/spl-widget/loader.js"></script>For your live website (production):
<script src="https://deo.shopeemobile.com/shopee/shopee-shopeepayfe-live-global/spl-widget/loader.js"></script>Start with the non-production URL to test your installation before going live. You'll swap it to the production URL in the final step.
Step 2 — Initialize the widget with your store details
Immediately after the script tag from Step 1, add the following initialization block. Replace the placeholder values with your real credentials and target market settings:
<script>
  SPLWidget.init({
    access_key: 'YOUR_SPL_PLUGIN_KEY',
    store_ext_id: 'YOUR_STORE_ID',
    currency: 'MYR',
    language: 'en',
    country: 'MY',
  });
</script>Update currency, language, and country to match your target market (e.g. IDR / id / ID for Indonesia). This initialization block only needs to appear once per page, regardless of how many widget placements you add.
Step 3 — Place the widget on your pages
For each placement, copy the corresponding <div> snippet and paste it into your page HTML at the exact spot where you want the SPayLater messaging to appear.
Homepage — awareness banner (no price required):
<div data-spl-widget="true" data-page-type="home_page"></div>Category / listing page — instalment line per product card:
<div
  data-spl-widget="true"
  data-page-type="category_page"
  data-amount="50000"
  data-product-id="CAT-001"
></div>Replace data-amount with the product price in the smallest currency unit (e.g. cents). Replace data-product-id with your SKU or product identifier. On a listing page, repeat this snippet for each product card.
Product Detail Page (PDP) — instalment line + tenor breakdown:
<div
  data-spl-widget="true"
  data-page-type="product_page"
  data-amount="50000"
  data-product-id="SKU-001"
></div>Place this snippet directly below your product price. Replace data-amount and data-product-id with the current product's values. The widget will automatically show the instalment line and the ⓘ info icon that opens the full tenor breakdown.
Step 4 — Save and publish
Save your template files and publish your website. No build step, no npm install, and no back-end changes are needed. Once the page is live, move to the How to verify section below to confirm everything is working.
When you are satisfied with the result in testing, swap the non-production script URL from Step 1 for the production URL, then republish. That's it — installation is complete.
Developer note — full SPLWidget.init() parameters, dynamic rendering, CSP rules, and browser support
SPLWidget.init() parameters
| Parameter | Type | Required | Description |
|---|---|---|---|
access_key | string | Yes | SPL plugin key provided by ShopeePay |
store_ext_id | string | Yes | Your ShopeePay Store External ID |
currency | string | Yes | ISO 4217 currency code, e.g. "MYR", "IDR", "THB" |
language | string | Yes | BCP 47 language code, e.g. "en", "id", "th" |
country | string | Yes | ISO 3166-1 alpha-2 country code, e.g. "MY", "ID", "TH" |
Anchor attributes
| Attribute | Required | Default | Description |
|---|---|---|---|
data-spl-widget="true" | Recommended | — | Recommended anchor marker. Use either this or the legacy class below — not both. |
class="spl-widget" | Legacy | — | Legacy anchor, still supported. For new integrations use data-spl-widget="true" instead. |
data-page-type | No | "product_page" | "home_page" | "category_page" | "product_page" | "cart_page" |
data-amount | No | 0 | Product price × 100 in local currency (e.g. 1.00 SGD → 100). Required for category_page and product_page. |
data-product-id | No | auto-generated | Your product's SKU or unique ID. Required for category_page and product_page. |
Widget types
| Page type | Preview | Display content |
|---|---|---|
home_page | 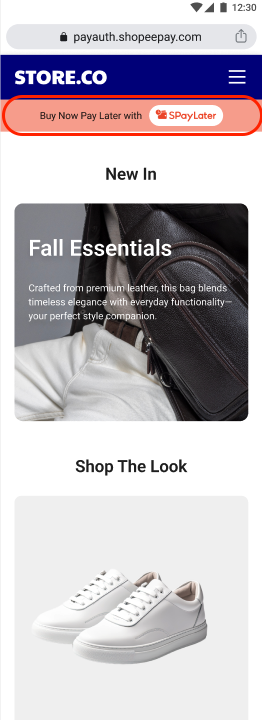 | Static promotional banner: "Buy Now Pay Later with SPayLater" |
category_page | 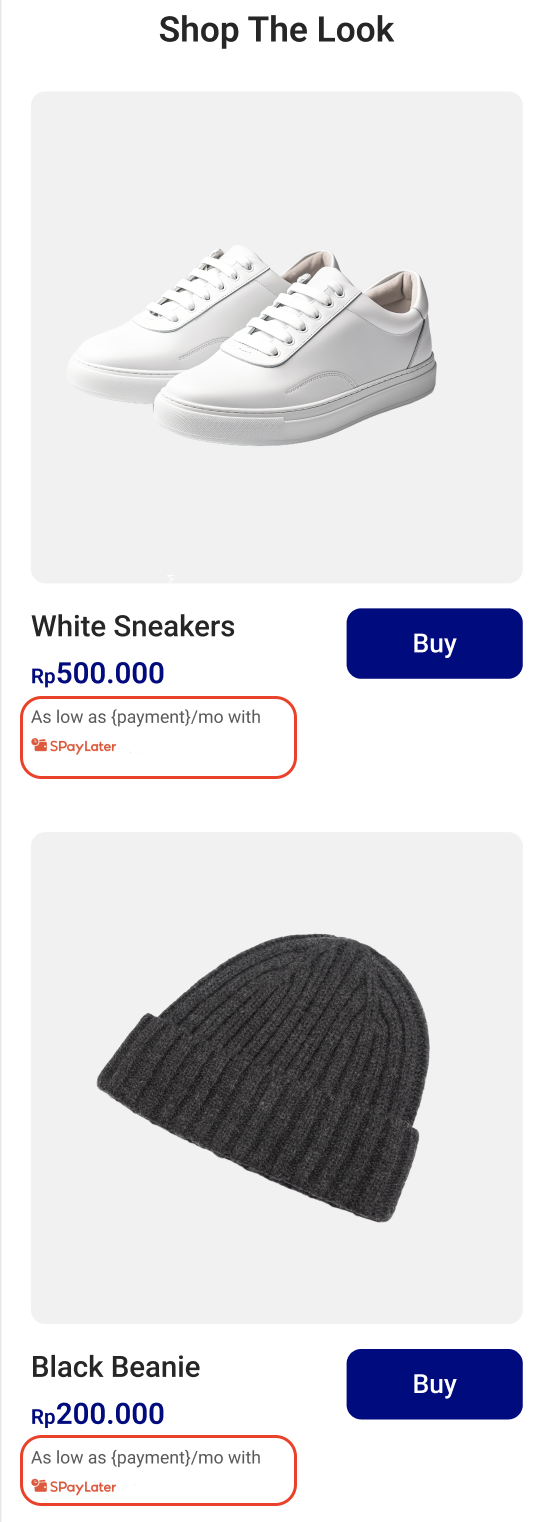 | Static instalment pricing: "As low as {amount}/mth with SPayLater" |
product_page |  | Instalment line + ⓘ info icon that opens the full tenor breakdown pop-up |
cart_page |  | Same as product_page |
Dynamic rendering (SPA / React / Vue)
If your product page content is rendered client-side after the initial page load (e.g. React, Vue, or any SPA), call SPLWidget.refresh() after each navigation event or page data update. This tells the widget to scan for new anchor divs and render them:
// Call after client-side navigation or product data change
SPLWidget.refresh();To handle the tenor modal closing (e.g. to refresh your page state), use the onModalClose callback:
SPLWidget.onModalClose(() => {
  // optional: run code when the customer closes the instalment plan modal
});Content Security Policy (CSP)
If your site uses a CSP Content-Security-Policy header, add the following to your policy:
script-src  'self' https://deo.shopeemobile.com;
connect-src 'self' https://*.shopeemobile.com https://*.shopeepay.com;
img-src     'self' data: https://*.shopeemobile.com;
frame-src 'self' https://*.shopeepay.com;Browser support
The widget supports all modern browsers: Chrome, Firefox, Safari, Edge (latest 2 major versions each). Internet Explorer is not supported.
Configuration
| Setting | Where to set it | Notes |
|---|---|---|
| Access Key | access_key in SPLWidget.init() | Required. Provided by your ShopeePay account manager. |
| Script URL (environment) | The src attribute of the loader <script> | Use the test URL during development; swap to the production URL before going live. |
| Country / Currency / Language | SPLWidget.init() params | Must match the market your SPayLater agreement covers. Using a mismatched country will result in no widget being rendered. |
| Store ID | store_ext_id in SPLWidget.init() | Required. Set once in the init call; applies to all widget instances on the page. |
| Page placement | data-page-type attribute on each anchor div | Controls which widget variant is shown. Set the correct value for each page. |
| Styling | Not configurable | The widget renders inside a Shadow DOM and uses SPayLater's standard styling. Custom CSS targeting the widget's internals is not supported. |
How to verify the installation
- Open your website in a browser using the non-production script URL (from Step 1). Open the browser developer tools and confirm there are no console errors referencing
SPLWidgetorloader.js. - Navigate to a page where you placed the widget (Homepage, Category, or Product page) and confirm the SPayLater messaging appears at the expected position — typically just below the product price.
- On a Product page, click the ⓘ info icon next to the instalment line. A modal pop-up should open listing the available instalment plans and monthly amounts.
- On a mobile browser or using browser DevTools in responsive mode, confirm the widget adapts correctly to the mobile-web layout.
- When everything looks correct, swap the non-production
srcURL for the production URL, save, and republish.
Troubleshooting
| Symptom | Likely cause | Fix |
|---|---|---|
| Widget is blank or nothing appears | Script not loading or CSP blocking it | Open the browser console. If you see a network error for loader.js, check your CSP headers and whitelist deo.shopeemobile.com. |
| Widget shows but no instalment price | Wrong country/currency or amount is missing | Confirm currency and country in SPLWidget.init() match your SPayLater market. Confirm data-amount is set on the anchor div and is in the smallest currency unit. |
| Widget appears on page load but disappears after navigation (SPA) | SPLWidget not notified of client-side route change | Call SPLWidget.refresh() after each client-side navigation event. |
| Tenor pop-up does not open | Wrong data-page-type on the PDP div | The tenor pop-up only appears for data-page-type="product_page". Check you haven't accidentally used category_page on your PDP. |
| Widget works in test but not in production | Still using the non-production script URL, or store not activated for LIVE | Confirm you swapped to the production loader URL. If already done, contact your ShopeePay account manager to verify your store is activated for the live environment. |
FAQ
Do I need a developer to install this?
You need someone who can edit your website's HTML source — typically a web developer or a tech-savvy team member with access to your CMS or template files. The actual change is copy-and-paste of two HTML snippets, so there is no programming experience required beyond knowing where to find the <head> section.
Will the widget slow down my website?
The loader script is approximately 12 KB and loads asynchronously so it does not block your page from rendering. The instalment pricing is fetched in the background after the page has already displayed, so there is no visible delay for customers.
I use React / Vue / Next.js. Is there a component I can install?
The widget is distributed as a plain JavaScript snippet — there is no dedicated React or Vue component. Add the loader script to your app's <head>, call SPLWidget.init() once, drop the anchor <div> into your JSX/template, and call SPLWidget.refresh() after client-side navigation. That is all that is needed.
Can I place the widget more than once on the same page?
Yes — on a listing page, you can add one anchor <div> per product card, each with its own data-amount and data-product-id. The widget script will render each one independently. The SPLWidget.init() call only happens once, at the top of the page.
What if I only want to add the widget to some pages, not all?
The loader script and init block only need to be on pages where you want to display SPayLater messaging. If your CMS allows per-page script injection, add them only to your Homepage, Category pages, and Product pages. Alternatively, add them site-wide — if a page has no anchor div, the widget simply does nothing on that page.